From The Heart Crafts, Designed By Suzanne Allen

Thursday, November 4, 2010

Martha Stewart Inspired Thanksgiving Day


I love watching Martha Stewart, she always has the best ideas. I saw her painting gourds and pumpkins on her show and decided to try it for my Thanksgiving centerpiece last year. It took a bit of time, but I really enjoyed painting and creating the design as I went.


I recycled a Halloween pumpkin which I had already been using for my table centerpiece. I had attached a couple of dried fall leaves to it's top and decided to carry through this idea for my Thanksgiving table centrepiece.


I started out by painting the whole pumpkin Martha Stewart green, then hand painted on gold swirls, and last I added glitter-glue dots for a sparkling jeweled look. While painting, I placed the pumpkin on a lazy-Susan so I could turn it, while working on it, without actually touching the wet paint. Last I gave it a couple coats of clear paint to seal it and give it a nice shine. 


I also painted the stem gold and attached a couple of fall leaves that I had dried ahead of time and also painted gold by hand. I decided not to spray paint them as I figured that they'd probably just blow away! I used regular acrylic paints for the whole project; pumpkin, stem, swirls, sealer and leaves.


A couple of weeks before Thanksgiving, I had gathered several fall leaves from outside and carefully pressed them in heavy books between sheets of waxed paper. When they were dry, I hand painted them gold and tied them to the chandelier with fine gold thread so they would look like they were fluttering from the trees on a breezy fall day. 


I love natural things from nature, so I gathered a few berries and buckeyes from places I had noticed while out riding my bike. The berries circled around the pumpkin were purchased from Michael's Crafts. I arranged my gathered treasures on the table around the pumpkin, also using some painted gold leaves and a couple of fresh green and red pears.


The table was set before the guests arrived, but there was still a few things left to do. My sister and son, (standing in the back), graciously offered to help me with last minute food preparations which made Thanksgiving more fun!


I set out my Mikasa bone china and Oneida silverware, only brought out on special occasions. I folded the napkins in the wooden napkin ring holders that I had also painted gold, to match the leaves and pumpkin stem. I absolutely love candles and the romantic mood they set, so I placed a votive, in a glass votive holder, on each place setting.


I couldn't resist lightly glittering the top of each glass votive holder to give it that little added sparkle, (Martha Stewart would have too!). It was so easy just smearing a tiny bit of glitter-glue around with my finger and letting it dry. Then I placed a golden leaf under each votive for a simple elegant look.


The turkey was done and the crystal glasses were filled, it was time to light the Thanksgiving table's center candles. It is a tradition in our home for the hostess to do the candle lighting honors, signifying that she is ready to serve the meal, and that would be me!


I like to change the lighting, after the candles are lit, to see what mood setting I like the best. This was with the chandelier lights turned all the way down, not as warm and glowing as with them on, but still kind of a pretty look.


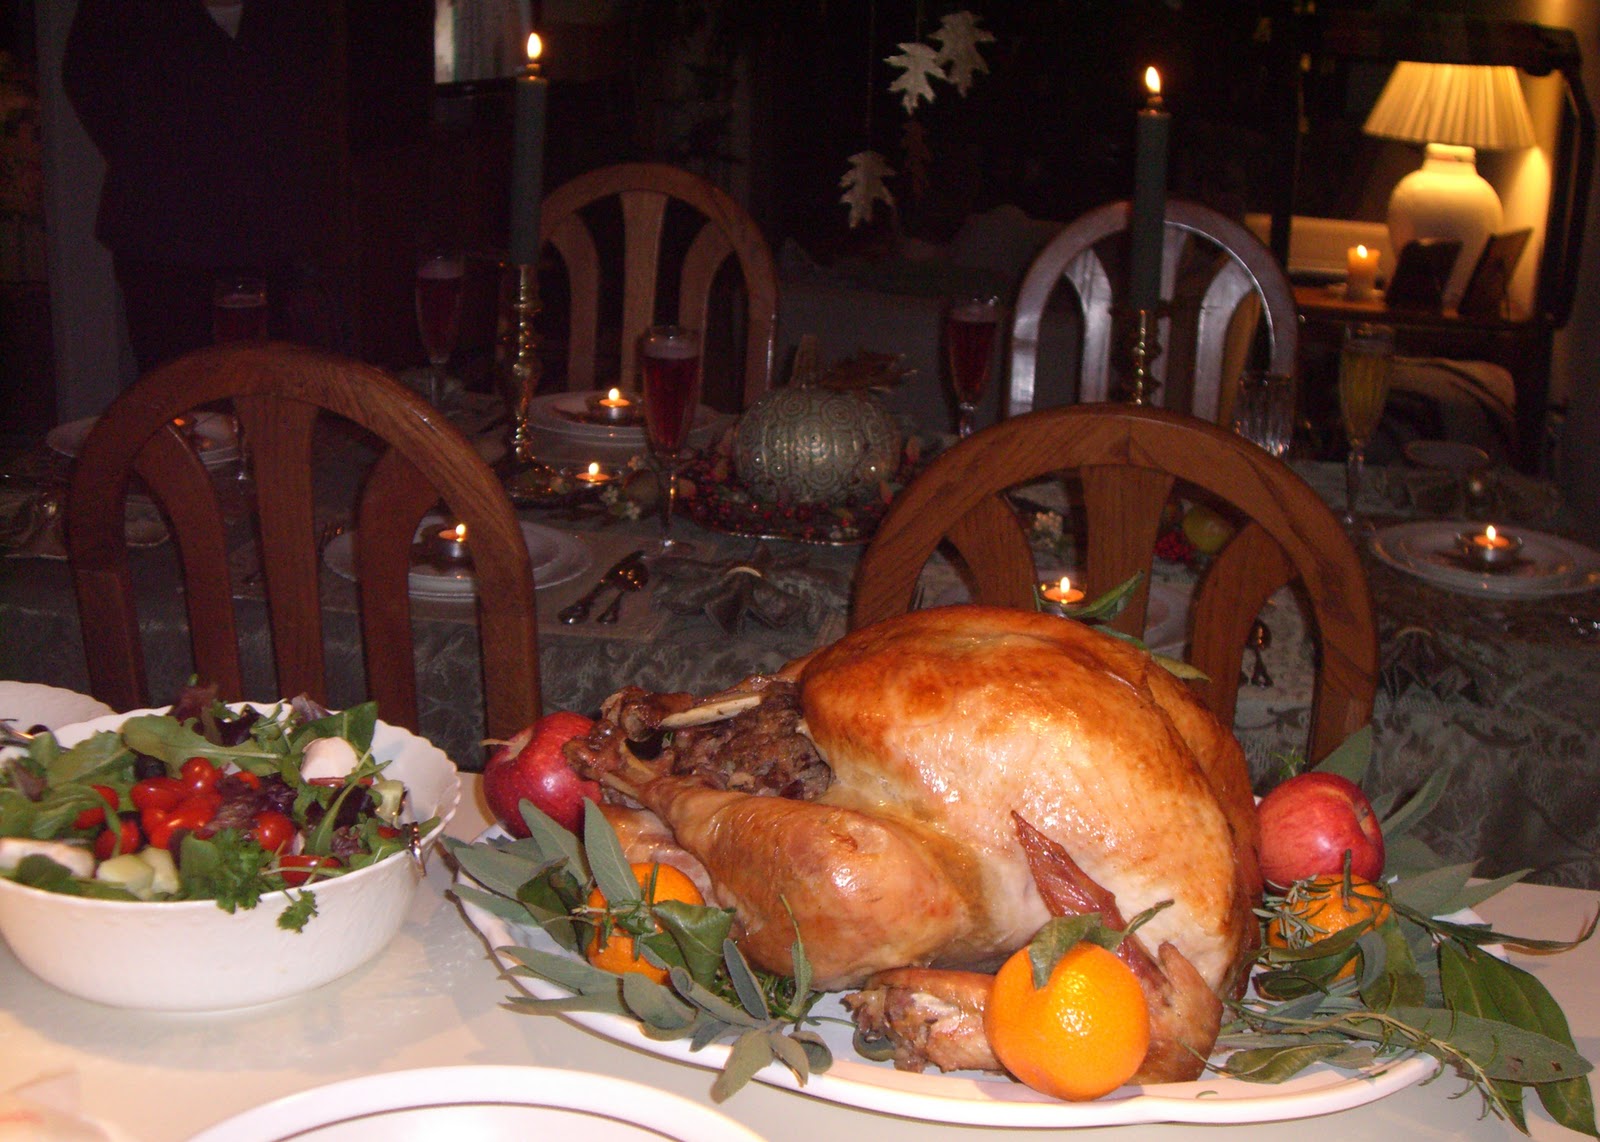
The turkey had rested, the candles were lit and it was time to call all of the guests to come sit down together for the Thanksgiving feast. You can see how the hanging gold leaves would catch the light from the flickering pillar candles.


 My guests and I were seated, (all but one, kind enough to be the photographer), and ready for the feast, but not before a few more photos were taken to remember this special day. My big sis holds up a glass of sparkling Martinelli's and makes a cheerful toast to family getting together on Thanksgiving Day!


The Thanksgiving meal was enjoyed by all, and my Stewart inspired pumpkin centerpiece got a couple of nice compliments. 


Years ago I recovered my dining room chairs in a dusty pink upholstery velvet, and they just didn't go with the green and gold pumpkin. So I made some new simple chair seat covers by sewing two layers of fabric together, turning right side out and then sewing a casing around the edges. Then I threaded matching ribbon through the casing and drew it up tight around the seats, tying it tightly. I also sewed ribbons to each corner of the covers to secure them by tying bows around the chair's legs. The seat covers are reversible with an Autumn leaves fabric on the other side.


I already had these bare wood, fall, wall hangers but could never decide just how to paint them. But I finally knew what to do with them last year and hand painted them to match the color scheme of my Thanksgiving table. Then I clear coated them with acrylic sealer and hung them on the wall nearby the table.


I also hung a Thanksgiving wreath, I had made a few years earlier, on the wall by the dining room table. It didn't exactly go with the color scheme of everything else, but it added a little bit of color to my white walls. For this year's Thanksgiving I have a new tablecloth that this wreath will go with nicely. The next time I use the sage green tablecloth and gold place mats, I will have to make a new festive wreath to match, and I know just right person to inspire me!


My M.S. inspired pumpkin lasted a very long time after Thanksgiving, but I could not figure out how to preserve it forever. Maybe Martha Stewart has the secret! It was one of a kind made for that one very special day and now I am glad I have some pictures to share.


Please forgive me for not adding the CSI Blogger button here, I was unable to get it on this page. I do however have the buttons on all of my other posts within this blog site and on my side bar. 

Wednesday, July 7, 2010

My Little Patio Garden


Welcome to our backyard patio!


I was happy when I read that pretty flower beds and pots would qualify for the CSI (Create, Share, Inspire) contest for "Outdoor Decor" this week.  That way I could share what I have done to create a little haven where I enjoy my love for flowers, and where others can sit and enjoy a cup of coffee or good book.  


My favorite flower of all, in our backyard patio, is a rose. I love to admire and smell these beautiful Double Delights.


A drip system, on an automatic timer, waters almost every single flower bed and pot. There are also drippers for the ground plants around the perimeter of the patio. My son was a huge help in setting up this very time saving and water conserving system. Note the dripping from the hanging basket.


 When the rain is finally gone, I bring out all of my wind chimes and pretty garden decor. I love the way this blue glass votive holder reflects on the fence in the sun. I tend to collect suns, stars and moons for my garden. Funny, I would have thought it would be hearts.


A stone bird bath sits amongst a small collection of container flowers. It attracts many varieties of birds that come to drink and bathe themselves. I have immensely enjoyed watching them congregate and flutter together in the water.


These cacti were started from one single rosette that I collected from a neighborhood garden, (I had permission). I find their long pink, spindly blooms fascinating! 


I like to mix cactus plants with other bright spring and summer flowers. I think it makes for an interesting variety in texture.  


This is my little wild, flower pot garden, complete with dragonfly trellis and frog bath. Sadly, the other blue glass votive holder broke...I am still waiting to find it's replacement.


All along the side of the house, are several hanging wire baskets, also with  drippers. Here you can see a bit of the tool shed we purchased from OSH and assembled ourselves. This is where patio furniture, wind chimes, garden decor, gardening tools, planting soils and fertilizers are kept. It really saves the furniture and decor during the rainy season.  


Along the fence are two, large redwood planter boxes. They are looking almost as weathered as the very old fence, though I have sealed them a few times.


The other redwood planter box.


Our little wrought iron patio table and chairs were also purchased at OSH. It has a textured glass table top and the chairs came with the seat cushions. The table disassembles and folds flat quickly for easy storage. The sideways pot in the back holds an overgrown Christmas tree my son begged for when he was very small. It started out a 1 foot tall grocery store purchase, but is really tall now and hangs way over our fence. I desperately need to replant it...but where? 


This is a little tea rose tree I got as a gift from my family. It produces lots and lots of tiny pink roses during the summer. I tried to dry them, but they tend to fade and loose their color.  


This is the corner of the patio where I place low light loving plants, they only get morning sun. My jasmine vine grew to the top of it's trellis and is out of the photo. The scent is devine when it blooms!


Another favorite of mine is this bright pink hydrangea. It has extra drippers staked in it's pot due to it's thirsty nature.


Some day I will learn how to dry and preserve these huge, beautiful blooms.


Twin ivy plants hang right outside the sliding glass door, giving us that lush forest feeling when we look out. They were purchased for $4.99 each at a local nursery and grew quite well after I repotted them.


Most of the larger plants are on rolling pot stands, many of which I made myself. I purchased the pre cut round discs, wheels and screws from, (you guessed it), OSH. I used my handy Makita drill set to attach the wheels then painted and sealed the discs. They allow me to easily move the sun loving roses around to capitalize on Mr. Sunshine! 


This is a grouping of four rose plants in the prime sun spot. There is also a 20 year old Sterling Silver rose on the opposite side, not shown.


This rose is called "Fame". I also have one called "Royal Beauty". When they both bloom, along with my Double Delight, I am tripley delighted!


Almost all of these little flowers, in the top soil of my rose pots, started on their own from seeds, blown in by the wind, from other pots. I like how they look, adding even more bright color to our patio.  


Two matching trellises are screwed to the fence with short shelving brackets. I painted the brackets and redwood trellises green. They have prooved to be very sturdy, even in the wildest wind.


We got a very good deal on a patio umbrella off season at Freidman's. It shades wonderfully on those blistering hot days, and can quickly be wound up and folded down to allow for more sun exposure. It is also stored it in the patio shed during the winter.


Most of the hanging flower basket's excess water, drips into the flower pots placed below. I always try to conserve water when I can.


This area definitely looks like a crazy lady lives here! I have a hard time turning down a struggling plant.


You can see here, along the right edge, one of our giant junipers. Years ago I planted two, 3 foot tall bushes, one on each side of our arched gate. Now they must be 40 feet tall! I watch birds burrowing inside to get to their nests, safely away from neighborhood kitties.


This area needs a little work. I eventually want to collect a couple of unusual cacti, as there are only two drippers available here. Hiding below the plant stand is a remnant of my son's water fountain fascination stage.


You can see here how the dripper hose snakes around to the separate potted flowers. Black wouldn't be my first choice of color, but probably the best color to camouflage them against the soil. 


My son may be a computer genius but he also has a green thumb! Every year he plants a little container vegetable garden, usually tomatoes, peas, green beans, bell peppers and strawberries. Newly planted......


And really growing well! He places tomato cages in the pots for the plants to grow into, even the peppers, peas and green beans. It's great to pick fresh produce right out of our own back yard!


Lightly steamed and ready to enjoy!


Here's the funny part, my son doesn't like to eat the vegetables, just grow them. I like to tease him about this and tried to entice him to take a bite of his tomatoes and beans...with no luck. Also, he is way too old to fall for this. 


Oh well, more for me! That's rosemary, sprinkled on top, from the back yard garden also.


This is my newest addition, a glorious passion flower vine! It was a gift from my mom and sisters, they heard I lost my first one in a hard frost last winter.


Right now it is blooming wildly, the flowers are remarkable! They smell like a combination of jasmine and honey...wonderful!


I love to watch the humming birds while I'm out there. This was one of my favorite finds, an old fashioned looking glass bottle feeder. Sometimes they actaully fight in flight over it...hey guys, there's plenty for everyone! 


I just had to have this humming bird feeder when I saw it. It is a hand blown glass sphere. I was very disappointed though, when I couldn't get it to stop leaking. I decided to keep it anyway because it is so pretty.


These two palm ferns started out very small also, but continue to flourish despite the frost burning them every year and my constant pruning of the fronds so my roses can get more sun. 


Our little backyard patio was even a safe haven for a sweet little dove's nest. I had to remove the dripper to that basket for awhile.


Perfect!


Hope you enjoyed visiting our little patio garden. Never hesitate to surround yourself with nature's beauty, it brings peace to the soul.


Visit thecsiproject.com